
How Do I Fill My Cremation Jewelry?
Adding the tribute to the interior of your cremation jewelry is simple and should take less than twenty minutes. Following a few easy steps along with inspecting your keepsake weekly ensures that your remembrance remains safe and secure inside the jewelry.


Step 1 - Opening your Keepsake
The first step in filling your keepsake is to find the opening of the small internal urn. Depending on the type of keepsake you selected this can be in different spots. Pendants may have a bail that when unscrewed exposes the interior compartment or they may have a strategically placed screw on the back or one of the sides of the pendant. Cremation rings, bracelets and keychains have a threaded screw that is typically on the underside of the jewelry where it isn’t seen when worn. (figure b)
After locating the threaded screw, use the included screwdriver to open. Place the screw on your work surface out of harms way so that is isn’t accidentally hit with an elbow or a hand and knocked onto the ground.
Step 2 - Fill your Keepsake
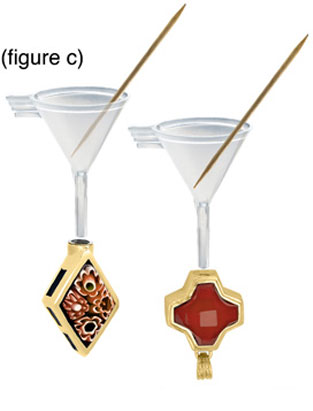
After exposing the small internal urn, place the tip of the included funnel into the opening. (figure c) Gently tap your remembrance into the urn. Cremated ashes aren’t fine ash and you may need to use the filling sticks to assist with getting some of the bigger pieces of ash into the jewelry. Be careful not to overfill the keepsake. The keepsake should only be 80 to 90 percent full, or there will not be enough room to reattach the threaded bail or set screw. You can use one of the filling sticks to help "push" the cremains through the funnel opening, and in to the keepsake.
After filling, remove the funnel and make sure that the opening and threads are free of cremains. Screw the threaded bail or set screw (clockwise) back on the keepsake making sure that the bail/screw sets down flush and the threads are clear. If you have overfilled the keepsake the threaded bail or set screw will not tighten up flush to the jewelry, and you will have to remove the excess cremains and retighten.
Step 3 - Prepare your sealant
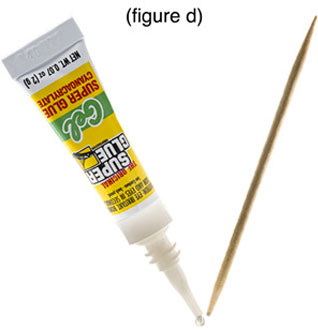
We highly recommend that you permanently seal your keepsake. Unscrew the threaded bail or set screw so that you can see a small portion of the threads. Do not remove the threaded bail/set screw. Apply a top glue to the end of the filling stick (figure d)
Step 4 - Apply your sealant
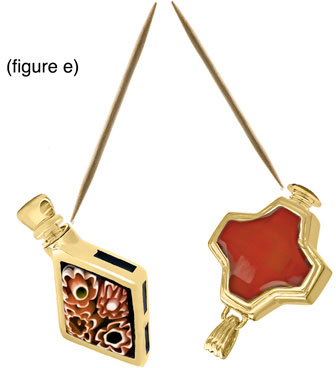
Using the filling stick, place the drop of glue on the threads under the head of the threaded bail or set screw and quickly tighten. (figure e) Wipe any excess adhesive away from the top of the screw or the opening once the screw is flush with the jewelry. If the adhesive dries before the threaded screw is completely flush with the jewelry, don’t panic. Dip the tip of a q-tip into finger nail polish remover, barely dampening the q-tip, and gently rub the remover along the threads of the screw. This will allow the adhesive to loosen and the screw to be completely inserted into the keepsake.

Step 5 - Align your bail.
If your keepsake has a threaded bail, you need to make sure to line up the bail eyelet so that the keepsake will hang flat against your chest. (figure f) To make sure your keepsake has cured properly after the sealant has been applied, please wait 12 hours before wearing. We do not recommend that your wear your keepsake in the water or while showering
Please see our helpful video on filling your Jewelry Keepsake
Adding the interior remembrance to your keepsake doesn’t need to be stressful. Following a few steps and having all the tools necessary laid out in front of you as well as reading through the included instructions makes an emotional process a little easier to manage. Please note - If you aren’t comfortable filling your cremation jewelry, most funeral homes will fill it for you at no additional charge or for a small nominal fee.